

China Steel Purlin: Types, Uses, and Expert Buying Tips for Builders
2026-11-02
Steel purlins might not be the first thing you picture on a construction site, but they're the hidden backbone keeping roofs and walls from buckling under pressure. If you're sourcing in China, the sheer range of profiles—C, Z, U—and coating options can quietly make or break your project's budget and durability. That's why we've put together this straight-talking guide: it walks through the main types, where each one actually performs best, and the buying traps even experienced builders fall into. Along the way, keep an eye on manufacturers like LANYUN, who've built a reputation for consistent gauge tolerances and on-time delivery—details that matter more than most spec sheets admit.
Z-Sections vs C-Sections: Not Just a Shape Preference
Many designers treat the choice between Z-sections and C-sections as a simple geometric preference, but real-world performance tells a more nuanced story. Each profile carries load differently due to how its flanges align relative to the web. A C-section has both flanges on the same side of the web, which creates an eccentric loading path when used as a beam or column. This eccentricity often demands additional bracing or thicker material to resist twist, especially in longer spans. Z-sections, by contrast, place flanges on opposite sides, allowing nested stacking and a more balanced shear flow when overlapped at purlin laps. The distinction becomes critical in roof systems, where overlapping Z-purlins can create a continuous structural member, while C-purlins typically require butt joints and more fasteners to achieve similar stiffness.
Beyond mechanics, fabrication and handling introduce hidden cost differences that shape preference far beyond geometry. Z-profiles nest compactly for shipping, reducing transport volume by up to 25% compared to C-sections of the same gauge. On site, the ability to lap Z-sections means fewer alignment headaches and faster installation for continuous runs. However, C-sections retain an advantage in wall girts and shorter spans because their flat outer face simplifies attachment of sheathing or cladding—no need to work around alternating flange positions. Some builders also favor C-sections for their uniform appearance in exposed applications, where the visible profile becomes part of the architectural language. The practical decision usually hinges on span length, connection detailing, and whether the member will be used in a simple span or a continuous lapped system.
Thermal performance and corrosion resistance add another layer that shape alone cannot predict. Because Z-sections overlap, they create a double thickness at laps that can act as a thermal bridge if not insulated properly. C-sections, with their open orientation, may allow more direct moisture drainage when placed with flanges facing downward. Galvanizing quality often matters more than profile choice; a poorly coated Z-section will corrode faster than a properly treated C-section regardless of shape. Engineers who push beyond the shape preference learn to ask where the section will sit in the assembly, how it connects to adjacent components, and what environmental stresses it will face. Only then does the Z versus C debate become less about shape and more about system fit.
Galvanizing Thickness Claims That Deserve a Closer Look
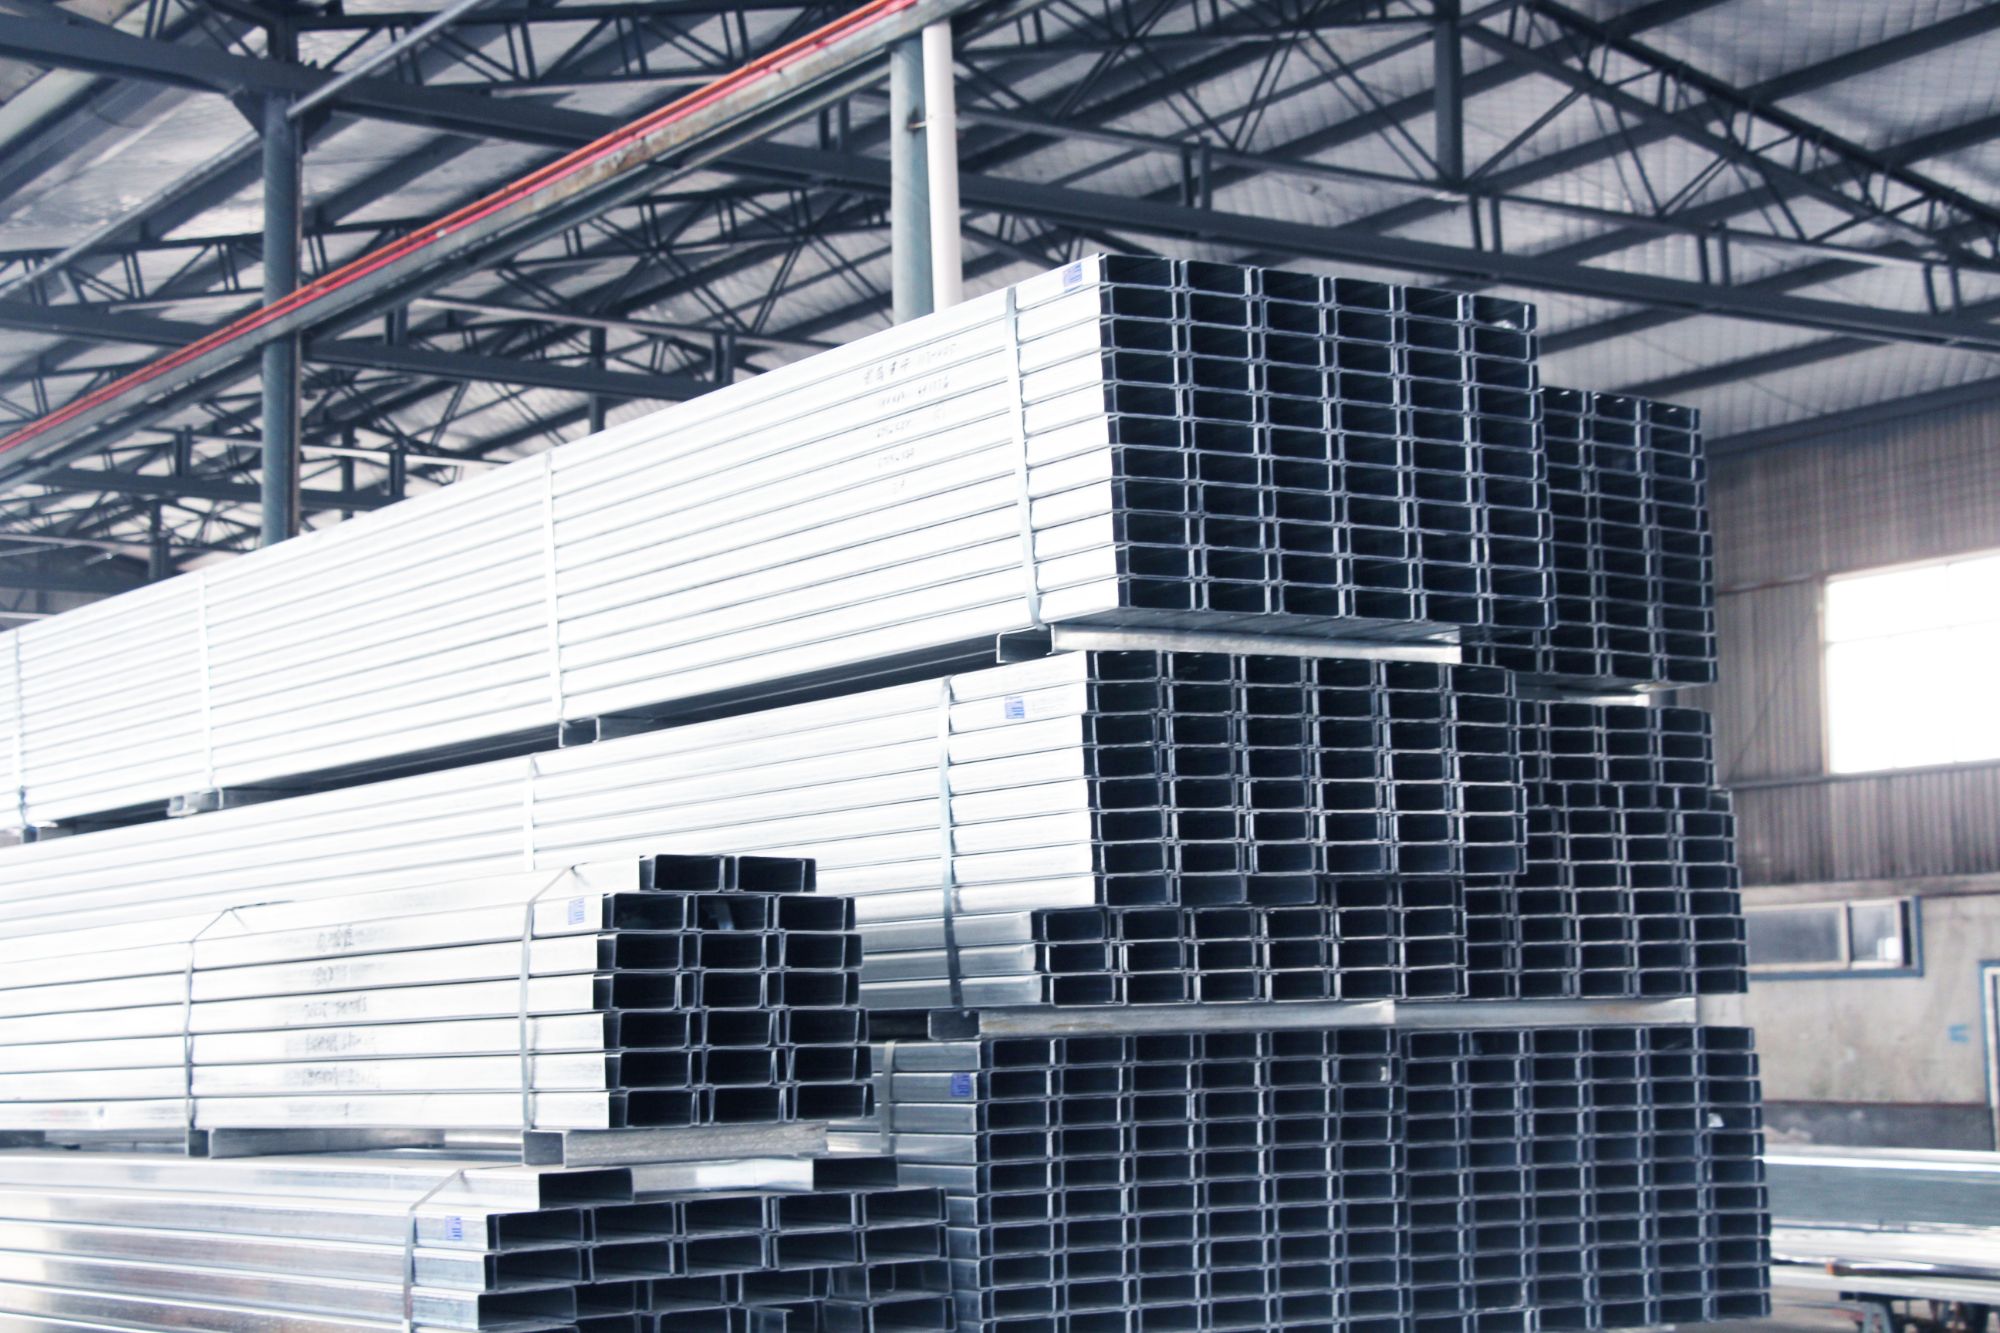
Anyone who's spent time comparing galvanizer quotes has run into the same pattern: one supplier promises 85 microns, another insists on 100, and a third shrugs and says 'it depends.' That last answer is usually closer to the truth. Coating thickness in hot-dip galvanizing isn't a single setting on a machine. It emerges from the steel's chemistry, the dwell time, and how the zinc drains from complex shapes. When a claim sounds too neat, it's worth asking what exactly was measured.
Take a threaded rod or a welded bracket. The flat shank might read 95 microns, the thread crest 65, and the area near a weld 150. Magnetic gauges average some of this, but placement matters enormously. A supplier quoting a single number may be cherry-picking the highest reading, or they may honestly not know the spread. If the test method isn't named—ASTM A123, ISO 1461, or a customer spec—the number doesn't carry much weight. Ask for the range and the location of each measurement, not just the headline figure.
Silicon and phosphorus in the base steel can push coating growth far beyond the nominal target, producing thick but brittle layers that flake under impact. A lower thickness on a high-strength steel isn't automatically a defect; it can be a sign of a controlled reaction. The real question is whether the coating meets the specified standard for that steel section and end use. Next time a galvanizing thickness claim crosses your desk, look for the test report, the standard reference, and the probe points before taking the number at face value.
Reading Chinese Steel Grades Beyond the Q235 Label
Most buyers stop at the familiar “Q235” on a mill certificate and assume the steel is interchangeable from one heat to the next. That habit can lead to costly surprises. The prefix Q stands for yield strength, and 235 indicates a minimum yield of 235 MPa, but the label alone says almost nothing about toughness, weldability, or chemical limits. Chinese standards such as GB/T 700 and GB/T 3274 split Q235 into quality grades A, B, C, and D, each with different impact test requirements and allowable sulfur and phosphorus levels. Grade A, for instance, does not require impact testing at all, while Grade D demands Charpy V-notch energy at -20°C. Ignoring the suffix means you may be welding a steel that becomes brittle exactly where the design assumes ductility.
Beyond the letter grade, deoxidation practice is another hidden variable. A “Q235B” can be rimmed, killed, or semi-killed depending on the mill, and the difference shows up in aging behavior, surface quality, and consistency through the thickness. Rimmed steel may be cheaper and easier to form for simple profiles, but it can suffer from severe strain aging and uneven core properties. One heat may be marked as Q235B-Z for killed steel, while another carries only “Q235B” with no deoxidation symbol, leaving the choice to the mill. For critical welded connections or low-temperature service, specifying Q235B-Z or Q235C-Z is a much safer path than trusting a bare Q235B.
Then there is the conversation the label never has with the design drawing: actual chemical composition varies within allowed ranges, and different mills optimize for different rolling schedules. Two heats of Q235B can both meet the standard yet behave differently under fatigue, low temperature, or seismic loading. This is why experienced engineers look past the grade to the full material test report, the heat number, the product standard, and even the specific mill’s long-term data. A label is a starting point, not a guarantee.
Pre-Punched Holes: Tolerances That Affect Assembly Speed
On assembly lines, pre-punched holes are often treated as a given, but their tolerances quietly dictate how fast a line can move. A hole that's slightly undersized forces workers to ream or angle fasteners, while an oversized one leads to misalignment and extra fiddling. Those small delays compound quickly across hundreds of units.
Dimensional tolerance also interacts with material springback and punching wear. In sheet metal, for instance, a punch tool that's seen too many cycles drifts toward the upper limit, making holes oval or tapered. The result is that a bolt that should drop straight through now needs a tap with a hammer or a manual alignment step. Tightening the tolerance range from ±0.1 mm to ±0.05 mm can feel like an overreaction until you watch a line where every third fastener snags.
Perhaps the biggest overlooked factor is positional tolerance. Holes can be individually within size spec but slightly off location. When two or more holes need to line up with matching components, a cumulative shift of even half a millimeter turns a quick fastening job into a wrestling match. Designers who specify true position tolerances relative to a common datum, and then actually verify them on incoming parts, tend to see fewer surprises and a visibly steadier assembly cadence.
Packing and Shipping: Small Details That Prevent Bent Flanges
Flanges look sturdy, but the sealing face and thin neck are surprisingly easy to bend when a crate shifts during transit. A simple plywood disc bolted across the flange face keeps it rigid, and filling the bolt holes with plastic plugs stops straps from crushing the edges. These small steps cost almost nothing compared to re-machining a warped flange.
How you stack them matters more than most people think. Lay large flanges flat and the weight of the ones above will slowly bow the lower pieces, especially if the truck hits a rough patch. Stand them upright in a wooden cradle with a groove for each flange, and add a soft separator like corrugated cardboard between mating surfaces. If you have to stack, limit it to three high and put the heaviest at the bottom, never the other way.
Strapping is where good intentions go wrong. Ratchet straps cinched directly over a thin flange edge can bend it before the truck even moves. Use wide fabric slings and place them around the body, not the rim. Also mark the crate with “Do not lay flat” and “Lift from base” so warehouse crews don’t flip it out of habit. A quick check of the flange face with a straightedge upon arrival catches any bend early enough to file a claim.
Final Inspection Before Unloading: A Builder's Practical Checklist
Walking the site one last time before the truck backs in can feel like a formality, but it's where costly mistakes get caught. Start at the perimeter and work inward: check that all access paths are clear, the ground is stable enough to support the delivery vehicle, and any overhead obstructions like low branches or power lines have been flagged or removed. A quick sweep for forgotten tools, stray nails, or debris underfoot isn't just about tidiness—it prevents the unloading crew from tripping or damaging materials as they move.
Next, verify the actual delivery against your order and the project's staging plan. Count the bundles, inspect the protective wrapping for tears or moisture, and confirm the dimensions of the largest items will fit through your designated storage area without forcing a last-minute reshuffle. If you spot a discrepancy or a damaged piece, mark it clearly and photograph it before the driver leaves. This is your window to refuse or note issues; once the truck pulls away, responsibility shifts.
Finally, walk the unloading route as if you were carrying the heaviest item yourself. Look for tight corners, uneven thresholds, or areas where a dolly might catch. A couple of minutes spent shimming a ramp edge or moving a parked wheelbarrow now saves hours of frustration—and possible injury—later. Make this checklist your own, but never skip the walkthrough. The best builders treat the pre-unload inspection as non-negotiable, not because a rulebook says so, but because they've seen what happens when it's rushed.
FAQ
Chinese factories typically roll C, Z, and occasionally U-shaped purlins. C purlins are better for simple spans where the flange faces the same direction, while Z purlins can be lapped and nested, making them ideal for continuous multi-span roofs. U purlins show up less often, usually in specific framing or bracing details. The choice often comes down to load direction and how the purlin connects to the main frame.
Most mills will offer Q235 and Q355 as standard options. Q235 is the older workhorse, fine for lighter loads and smaller spans, but Q355 gives you higher yield strength and often lets you reduce the material thickness without losing capacity. Always confirm the actual yield and tensile values on the mill certificate rather than trusting the grade name alone.
Ask for a recent mill test certificate and compare it against the physical sample. Check if the factory holds ISO 9001 or similar certifications, and don't be shy about requesting a short trial order before committing to a container load. A good sign is when they can walk you through their tolerance control, zinc coating measurement method, and packing process without hesitation.
For inland or dry climates, a Z275 coating (275 g/m² total both sides) is the common baseline. If the building sits near saltwater or in a heavily industrial zone, move up to Z350 or switch to an aluminium-zinc coating like AZ150. The extra cost is small compared to the price of early corrosion at the bolt holes and cut edges.
Yes, nearly all of them run computer-controlled cold roll forming lines with inline punching. You can send your hole layout and length schedule, and the purlins will arrive ready to bolt up on site. This saves a lot of field drilling and usually eliminates the need for on-site cutting, which also keeps the galvanized edges intact.
Pre-galvanized strip is coated before forming, so the cut ends and punched holes are left unprotected and will rust first. Hot-dip galvanizing is done after the purlin is shaped, giving full coverage, including edges and holes. If you are building in a corrosive environment or need long service life, hot-dip is worth the higher price. For dry indoor framing, pre-galvanized can be adequate.
Request export-grade packaging with steel strapping, plastic or paper wrap, and edge protectors on the bundles. Make sure each bundle is tagged with size, length, and quantity so you can check against the packing list. If the purlins are thin or long, discuss container loading plans with the supplier to prevent bending from unsupported overhang during transit.
No, they don't automatically meet anything. Some factories produce to Chinese standards by default, while others can make purlins to ASTM A653, EN 10346, or other specified standards. You need to state the exact standard, grade, coating class, and any third-party inspection requirements before production starts, and then verify the supplied documents against the physical goods.
Conclusion
When sourcing steel purlins from China, the first decision usually comes down to Z-sections versus C-sections, and it is rarely just about looks. Z-sections can be overlapped at the joint for continuous strength across a roof span, while C-sections tend to work better for simpler wall girts or smaller openings. Beyond the profile, you need to read the actual mill certificate rather than trusting a Q235 label. Many suppliers quote Q235 as a default, but tensile and yield values can vary significantly between heats, so ask for the full grade designation and check the elongation and yield numbers against your design assumptions. Galvanizing claims also deserve scrutiny—Z275 or G90 are common specs, but the actual coating weight on edges and corners is where rust starts, so request a coating thickness report instead of just a marketing sheet.
Pre-punched holes are another area where small tolerances either speed up assembly or eat your crew’s time. Confirm the hole diameter, longitudinal spacing, and edge distance before production, and make sure the punch-and-die setup matches your bolt size. Packing and shipping may seem like an afterthought, but nested bundles with insufficient edge protection often arrive with bent flanges, especially on thin gauge material. Ask for steel edge guards, proper stacking orientation, and photos of the loaded container before it leaves the factory. Finally, do a quick inspection at your yard before signing the delivery note: check the flange straightness, verify the galvanized surface has no bare spots or white rust staining, and pull a few random pieces to confirm hole alignment and length. These practical checks take less than half an hour and prevent most disputes that would otherwise surface in the middle of a build.
Contact Us
Contact Person: Nia
Email: [email protected]
Tel/WhatsApp: +86 18954360337
Website: https://www.sdppgi.com